


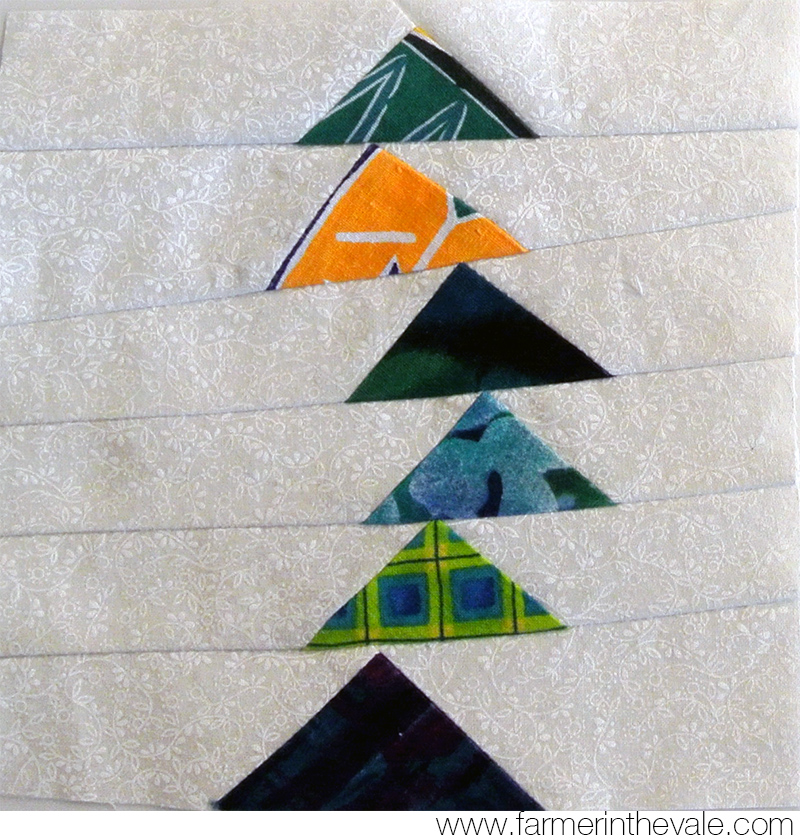
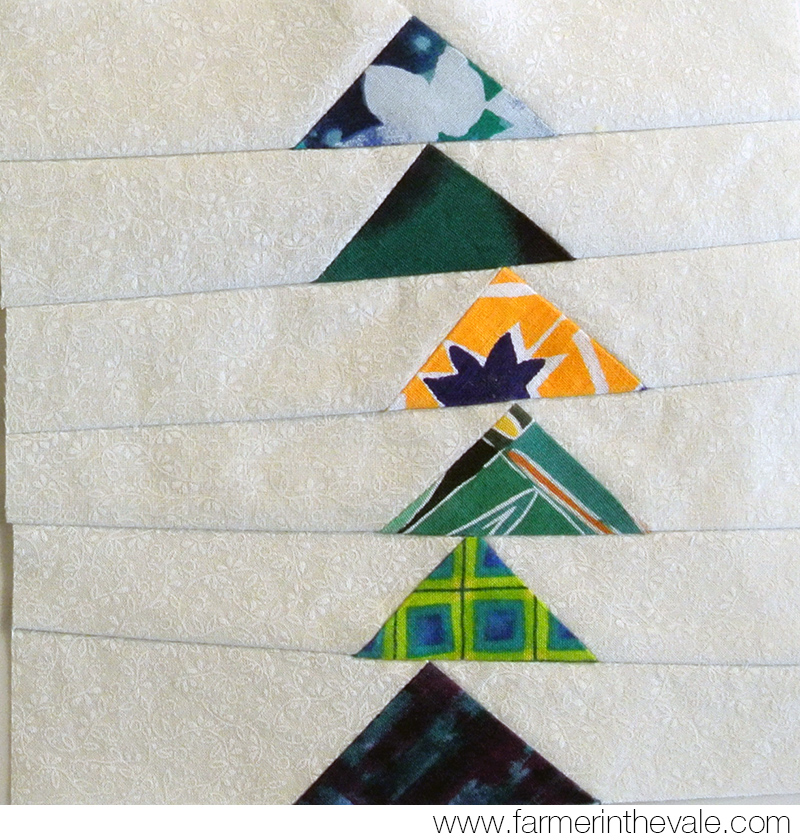
 This wacky variation of flying geese would make a great border.
So far I only have about 6 inches sewn. I think I will transform this pattern into one of my monthly table runners.
I wanted to make my geese wander around but I didn’t want to fuss with paper piecing. Luckily I have plenty of stash fabric to play with!
I started by cutting 1 1/2″ strips of my accent fabric (the geese). I then cut the strips into half square triangles. The fun of this pattern is that you don’t need to be super precise. It’s OK if your strips are a little too big or if your triangles aren’t exactly square.
Next I cut 2 1/2″ strips of my background fabric. I cut the strips into 8″ segments (my finished border is 6 1/2″ wide including seam allowance).
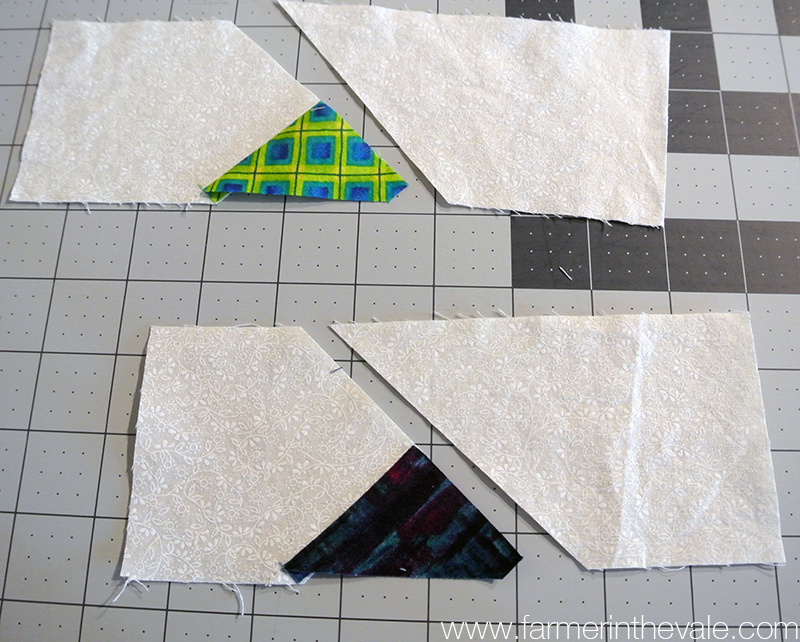
I stacked 4 segments together alternating right-side and wrong side facing up. This created mirror image pieces when I cut the segments.
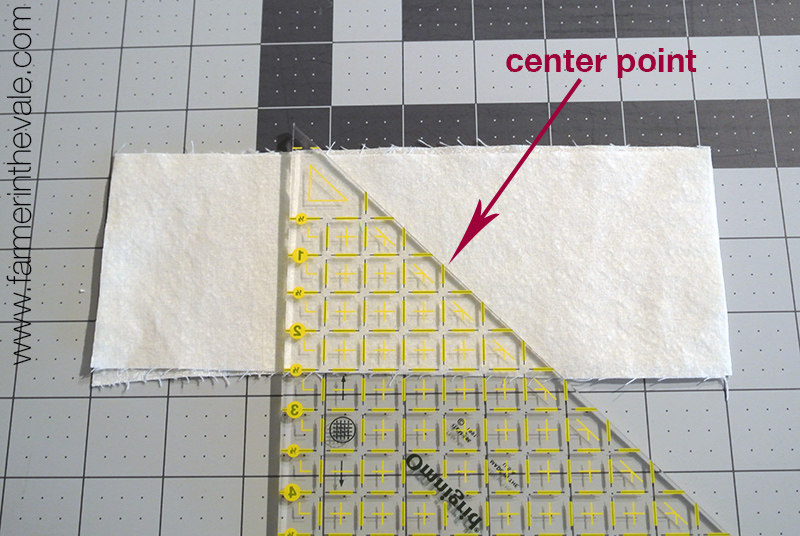
Next I cut my background segments in half at a 45 degree angle. It sounds confusing, but it’s not. Just find the center of each segment and line up your ruler so you cut a 45 degree line that runs through the center point. Again you don’t need to be super precise, it’s OK if you’re off by a little bit.
Next I matched up my accent triangles with the strips to create my final strip (see photo). Laying everything out was very helpful.
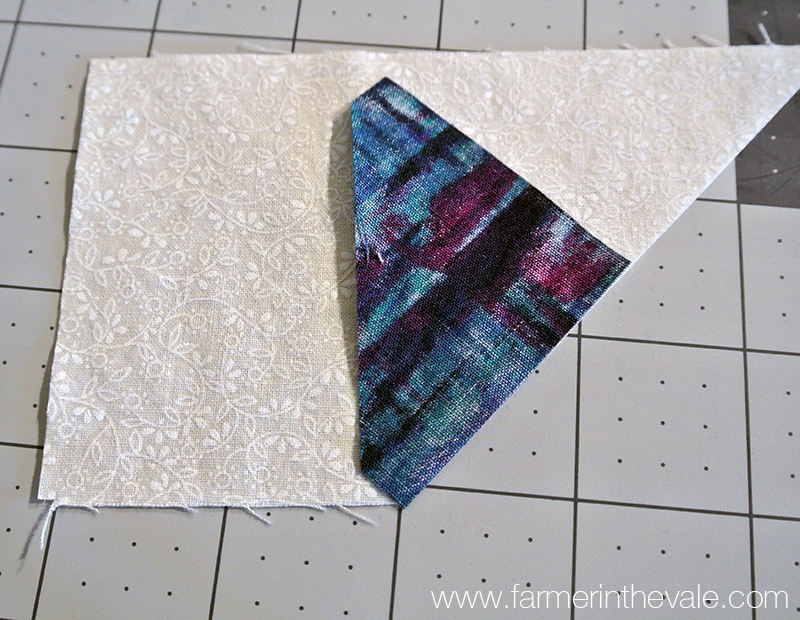
Now it was time to sew! I started by matching the left side of the strip with the accent triangle. I lined up the bottom edge of the triangle (the bias edge) with the bottom edge of the strip as shown in the photo. I found pinning helpful since the smaller piece tended to move around.
I pressed the seam towards the darker fabric.
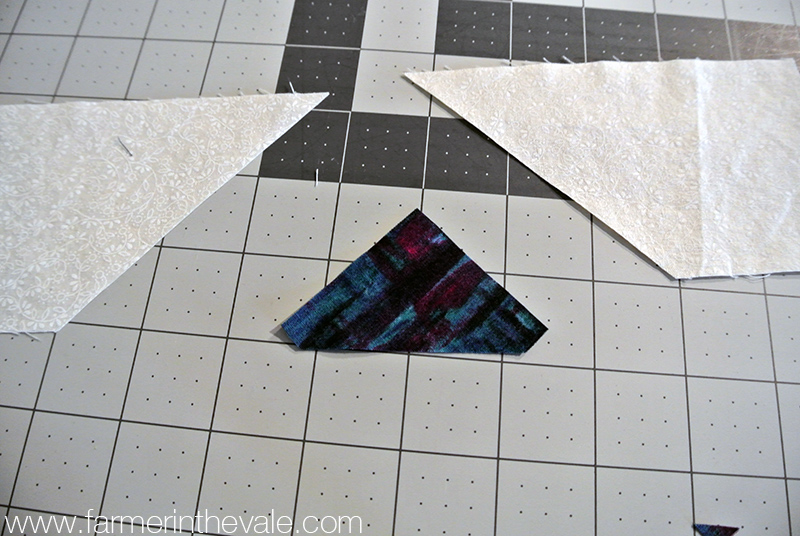
Next I lined up my ruler with the edge of the accent fabric and trimmed away a triangle of the white strip fabric. This created the long edge where I would sew the remaining strip. The photo on the right shows the strip after trimming.
 Again I lined up the bottom of the triangle (the bias edge) with the bottom of the stripped and pinned everything in place before sewing.
I pressed toward the dark fabric again and trimmed my bottom edge straight. You don’t need to worry about trimming off too much on the bottom, the size of your finished triangle does not need to precise.
I repeated the above steps for all my pieced strips. I used 6 strips in each of the finished blocks shown in my photos.
Next came the wandering. I trimmed the top edge of the pieced strip to leave just 1/4″ of white fabric above the accent triangle. But, instead of cutting parallel to the bottom edge, I cut at a slight angle. Then I sewed the top edge of the strip to the bottom edge of a second strip.
I made sure that the top point of my accent triangle touched the bottom edge of the next triangle and pinned everything in place before sewing. After sewing the first two strips together I trimmed the block to 6 1/2″ wide.
I repeated the last two steps for every strip.
Wow! I can’t believe how confusing these instructions are! But don’t stress out – you don’t need to be precise! Just sew straight and trim straight and you’ll be fine.
This week I’m linking up to Freshly Pieced.

What a neat idea!! Thank you for sharing. Stopping by from Freshly Pieced link party.
Thanks Carole!
Your geese are super fun. Thanks for sharing how you made them.
Thanks Andrea! It was fun to see something I imagined in my head actually work out when I sewed it.
What a cool border design! I think I might need to do it in a larger size, but I bet the tiny ones looks great all together!
Thanks Kat! A larger size is a good idea. It took a while to create these little squares.
That will make a really fun table runner.
Thanks Tina!